I’m currently in the process of rewiring my TBI‑affected brain — which, frankly, feels a bit like trying to update a 1998 operating system using a hand‑crank generator. But here I am, diligently cultivating new synapses and building the cognitive reserve I’ll need to outrun the long family line of Alzheimer’s and dementia that’s basically waiting for me like a surprise party I never asked for.
For those of us blessed with a high‑octane, Type‑A monkey mind, the challenge isn’t just memory retention. It’s the relentless internal chatter — the mental equivalent of a toddler with a tambourine — that keeps the brain stuck in a low‑grade stress loop. My goal is to slow that down, literally and figuratively, by using the physical act of cursive writing to drag my brain out of its frantic autopilot and into something resembling deliberate, structural growth.
Why Cursive? Because My Brain Apparently Needs Handwriting Therapy
Cursive isn’t just “fancy handwriting.” It’s a neurological workout disguised as nostalgia — and the science backs it up.
A 2024 high‑density EEG study found that handwriting (but not typing) activates widespread brain connectivity, especially in theta and alpha frequency bands, which are essential for memory and learning. 🔗 Van der Weel & Van der Meer (2024): https://www.frontiersin.org/articles/10.3389/fpsyg.2024.1333250/full(frontiersin.org in Bing)
Bilateral Brain Activation: Cursive requires continuous movement, forcing the left and right hemispheres to communicate across the corpus callosum — something my brain, like many brains, doesn’t always do unless bribed.
The Power of the Flow: Cursive mimics how thoughts should move: fluidly, not like a bullet‑pointed grocery list written by someone who forgot why they walked into the kitchen.
And this isn’t just about aesthetics — handwriting is increasingly recognized as a sensitive marker of cognitive health, especially in aging and neurodegenerative conditions. 🔗 Frontiers in Aging Neuroscience (2026): https://www.frontiersin.org/journals/aging-neuroscience(frontiersin.org in Bing)
Why 20 Minutes? Because That’s When My Brain Finally Stops Arguing
Neurologically, 20 minutes is the sweet spot.
The 5–7 Minute Shift: It takes that long for my monkey mind to stop screaming about laundry, emails, and the existential dread of “what was I supposed to be doing again.”
The Plasticity Window: Once I hit flow, the next 13–15 minutes are prime time for building new neural patterns — without tipping into the fatigue spiral that TBI brains know all too well.
Consistency Over Heroics: Twenty minutes is doable even on days when my brain feels like a browser with 47 tabs open and one of them is playing music but I can’t find which one.
This aligns with research on cognitive rhythms and time‑blocking: 🔗 Ahead App Research — The Science of Time‑Blocking: https://www.ahead-app.com/blog/the-science-of-time-blocking(ahead-app.com in Bing)
The Warm‑Up: Two Minutes of Drawing Infinity Like I’m Summoning a Portal
Before journaling, I warm up with two minutes of continuous figure‑eights.
The Drill: Fill a page with looping infinity symbols without lifting the pen.
The Goal: This “synaptic reset” quiets the monkey mind and preps the motor cortex for the sustained, fluid motion of cursive — like stretching before a workout, but for your neurons.
The “Anthropologist from Mars” Inventory: Because Humor Is Cheaper Than Therapy
Writing factually shifts processing from the amygdala (panic HQ) to the prefrontal cortex (the adult in the room). But pure clinical detachment can feel robotic, so I add humor.
The Prompt: Write 10 lines describing your current activity as if you’re an alien researcher observing a confused human.
Example: “The subject is staring at a glowing rectangle while consuming a heated liquid stimulant. The subject is aware of a laundry pile nearby but is ignoring it with impressive determination.”
This technique is supported by research showing that externalizing thoughts reduces default mode network activity, which is responsible for rumination. 🔗 Neurosity — Journaling and the Brain: https://neurosity.co/blogs/news/journaling-and-the-brain-how-writing-helps(neurosity.co in Bing)
Why This Works
Third‑Person Distance: Calling yourself “The Subject” creates psychological space from stress.
Humor = Cognitive Cross‑Training: To find the funny angle, your brain must shift perspectives quickly — a high‑level cognitive skill that builds resilience.
The Cursive Practice: Satire Meets Motor Cortex
Now combine the humor with exaggerated cursive.
The Drill: Write your alien observations in long, sweeping, dramatic cursive — the kind of handwriting that would make your third‑grade teacher weep with joy.
The Technique: When you get clever, you’ll want to speed up. Don’t. Slow down and make the loops even more ridiculous.
The Goal: You’re training precision and creativity simultaneously — the neurological equivalent of juggling while doing squats.
And yes, handwriting is increasingly being studied as a preventative tool for Alzheimer’s, thanks to its multi‑sensory, motor‑cognitive demands. 🔗 Atena Editora — Cognitive Benefits of Handwriting: https://www.atenaeditora.com.br/post/artigo-beneficios-cognitivos-da-escrita-manual(atenaeditora.com.br in Bing)
So… Is This Sustainable?
Honestly, yes. It’s structured enough to work on your busiest days, playful enough to keep you engaged, and scientifically grounded enough to satisfy your inner researcher. Plus, it gives your monkey mind something to do besides narrate your to‑do list in a panicked whisper.
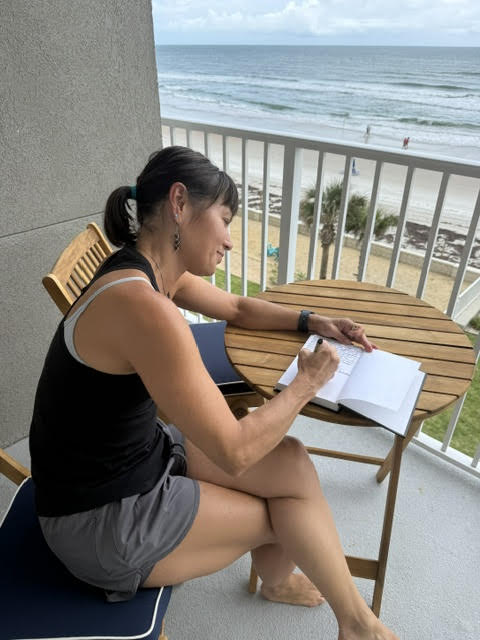
“While I’m deep in the weeds sorting through drafts and photos to catch up on my Japan travel posts, I figured it was time for a quick pit stop to share what my day-to-day life actually looks like right now. Spoiler alert: When I’m not mentally traversing the streets of Tokyo, my actual reality looks significantly less like a high-flying global itinerary and a lot more like a slow-motion science experiment. For those wondering how a recovering tech leader with a restless ‘monkey mind’ stays anchored between big trips, the answer turns out to be fewer bullet trains and significantly more agonizing over a single embroidery stitch. Here is a quick update on the current focus areas ruling my schedule—and keeping me from eating myself alive…”
When people find out I’m mostly retired, the question I get most often—usually delivered with a look of mild concern for my sanity—is: “But how do you keep yourself busy?”
It’s a fair question. For decades, my identity was entirely wrapped up in being a high-flying, hyper-efficient, classic Type A tech leader. My brain was a finely tuned racing engine. But then, twelve years ago, a Traumatic Brain Injury (TBI) forced an uninvited, aggressive downshift. I eventually had to leave a high-octane career I absolutely loved and face the humbling, frustrating, and often absurd task of learning a “new normal.”
Today, my professional output consists of a few high-level consulting projects and stepping onto a stage for a keynote speech a couple of times a year. It’s just enough to satisfy the old ego. But the rest of my time? I’ve traded intense strategic planning sessions for balance poses and spreadsheets for satin stitches.
To keep my recovering brain healthy and resilient, I’ve dedicated myself to learning entirely new, wildly contrasting skills. If you had told the younger version of me that my daily schedule would revolve around Tai Chi and embroidery, I would have laughed you out of the room. Yet, here we are.
If you are a fellow Type A trapped with a restless “monkey mind,” here is how I spend an hour and a half every day keeping my brain from eating itself alive.
The Morning Routine: Rewiring the Hardware. My daily brain-remodeling project happens in highly deliberate, bite-sized increments. It turns out the brain doesn’t need a grueling eight-hour shift to change; it just needs consistency.
Phase 1: The Morning Beach Walk & Tai Chi (20–30 Minutes). Every morning, after a brisk 2-5 mile walk on the beach to get the blood flowing, I step in to the comfort of my living room for 20 to 30 minutes of Tai Chi.
Now, if you’ve never seen a former corporate Type A attempt Tai Chi, picture a Ferrari trying to drive at exactly 2 miles per hour. Every fiber of my being wants to power through the movements, but the magic of Tai Chi is in the agonizing, beautiful slowness.
The Brain Science: By forcing my body to calculate fluid, slow-motion movements in three-dimensional space, I’m giving my cerebellum (coordination) and parietal cortex (spatial awareness) a massive workout. Tai Chi triggers the release of acetylcholine—a neurotransmitter that essentially acts like a “save button” for new neural connections. It’s structural engineering for my balance and motor maps, heavily disguised as a slow-motion martial art.
Phase 2: Micro-Movements and Embroidery (20–30 Minutes). Later in the morning, I pivot entirely. I sit down for exactly 20 to 30 minutes of embroidery. Yes, embroidery. Stop laughing.
Going from high-level tech strategy to meticulously threading a needle is the ultimate exercise in humility. My primary motor cortex—specifically the massive chunk of real estate dedicated to my hands and fingers—is forced into a state of hyper-synchronized focus.
The Brain Science: Every single millimeter of progress requires intense visual tracking and micro-motor precision. This creates dense, localized clusters of synapses in my motor and visual cortices. Even better? The aerobic boost from my earlier walk and Tai Chi primes my brain with BDNF (Brain-Derived Neurotrophic Factor), a literal fertilizer for neurons. By the time I pick up the needle, my brain is chemically optimized to build and insulate these new pathways.
The Intermission: Taming the Monkey Mind. Sandwiched into this routine, I add two 15-minute sessions of mindfulness and gratitude meditation daily.
For a Type A personality, meditation can feel like a form of psychological torture. Sit still? Do nothing? Focus on my breath when there are problems to solve? It feels counterintuitive. But for a brain recovering from a TBI—and a mind naturally prone to swinging from branch to branch like a caffeinated chimpanzee—this practice is non-negotiable.
This double-dose of daily mindfulness allows me to:
Hit the neuro-brakes: It down-regulates my sympathetic nervous system (the fight-or-flight response that Type A’s live in) and dials down the amygdala, reducing the background anxiety of “not doing enough.”
Anchor to the present: Instead of mourning the pre-TBI past or obsessing over an unpredictable future, it forces my prefrontal cortex to anchor into the absolute current moment.
Foster structural resilience: Studies show regular meditation actually thickens the gray matter in areas involved in emotional regulation and memory, while thinning the areas associated with stress.
The Hardest Part of the “New Normal.” If I’m being completely honest, it is still really hard to admit—even to myself—that I’m no longer leading huge, Worldwide Initiatives. My ego still wants to be the one orchestrating global strategies, not sitting on a couch trying to figure out how a single French knot works. Stepping back to enjoy the absolute simplicity of embroidery and Tai Chi, sprinkled with a bit of meditation, required swallowing a massive dose of pride.
But there is a silver lining to this forced humility. While my inner overachiever might still throw the occasional tantrum, those around me have noticed a massive shift. They genuinely appreciate a new calmer, kinder, and much more patient Rane. So, while I’m primarily doing this to painstakingly claw back some executive function, my friends and family are just glad I’m finally learning how to breathe.
Twelve years post-TBI, I am not the same person I was in leadership team meetings, and that is finally okay. I’ve learned that keeping a brain healthy isn’t about running it ragged; it’s about challenging it with novelty, precision, and deliberate rest.
If you are a fellow Type A struggling to slow down, or if you’re navigating your own version of a “new normal,” I highly recommend building your own eclectic routine. Pick one thing that challenges your large-scale balance, one thing that demands microscopic focus, and throw in some stillness to keep the gears greased.
Your monkey mind might fight you at first, but your synapses will thank you. Now, if you’ll excuse me, I have some fabric to tension, and it is going to take all the mental fortitude I possess.
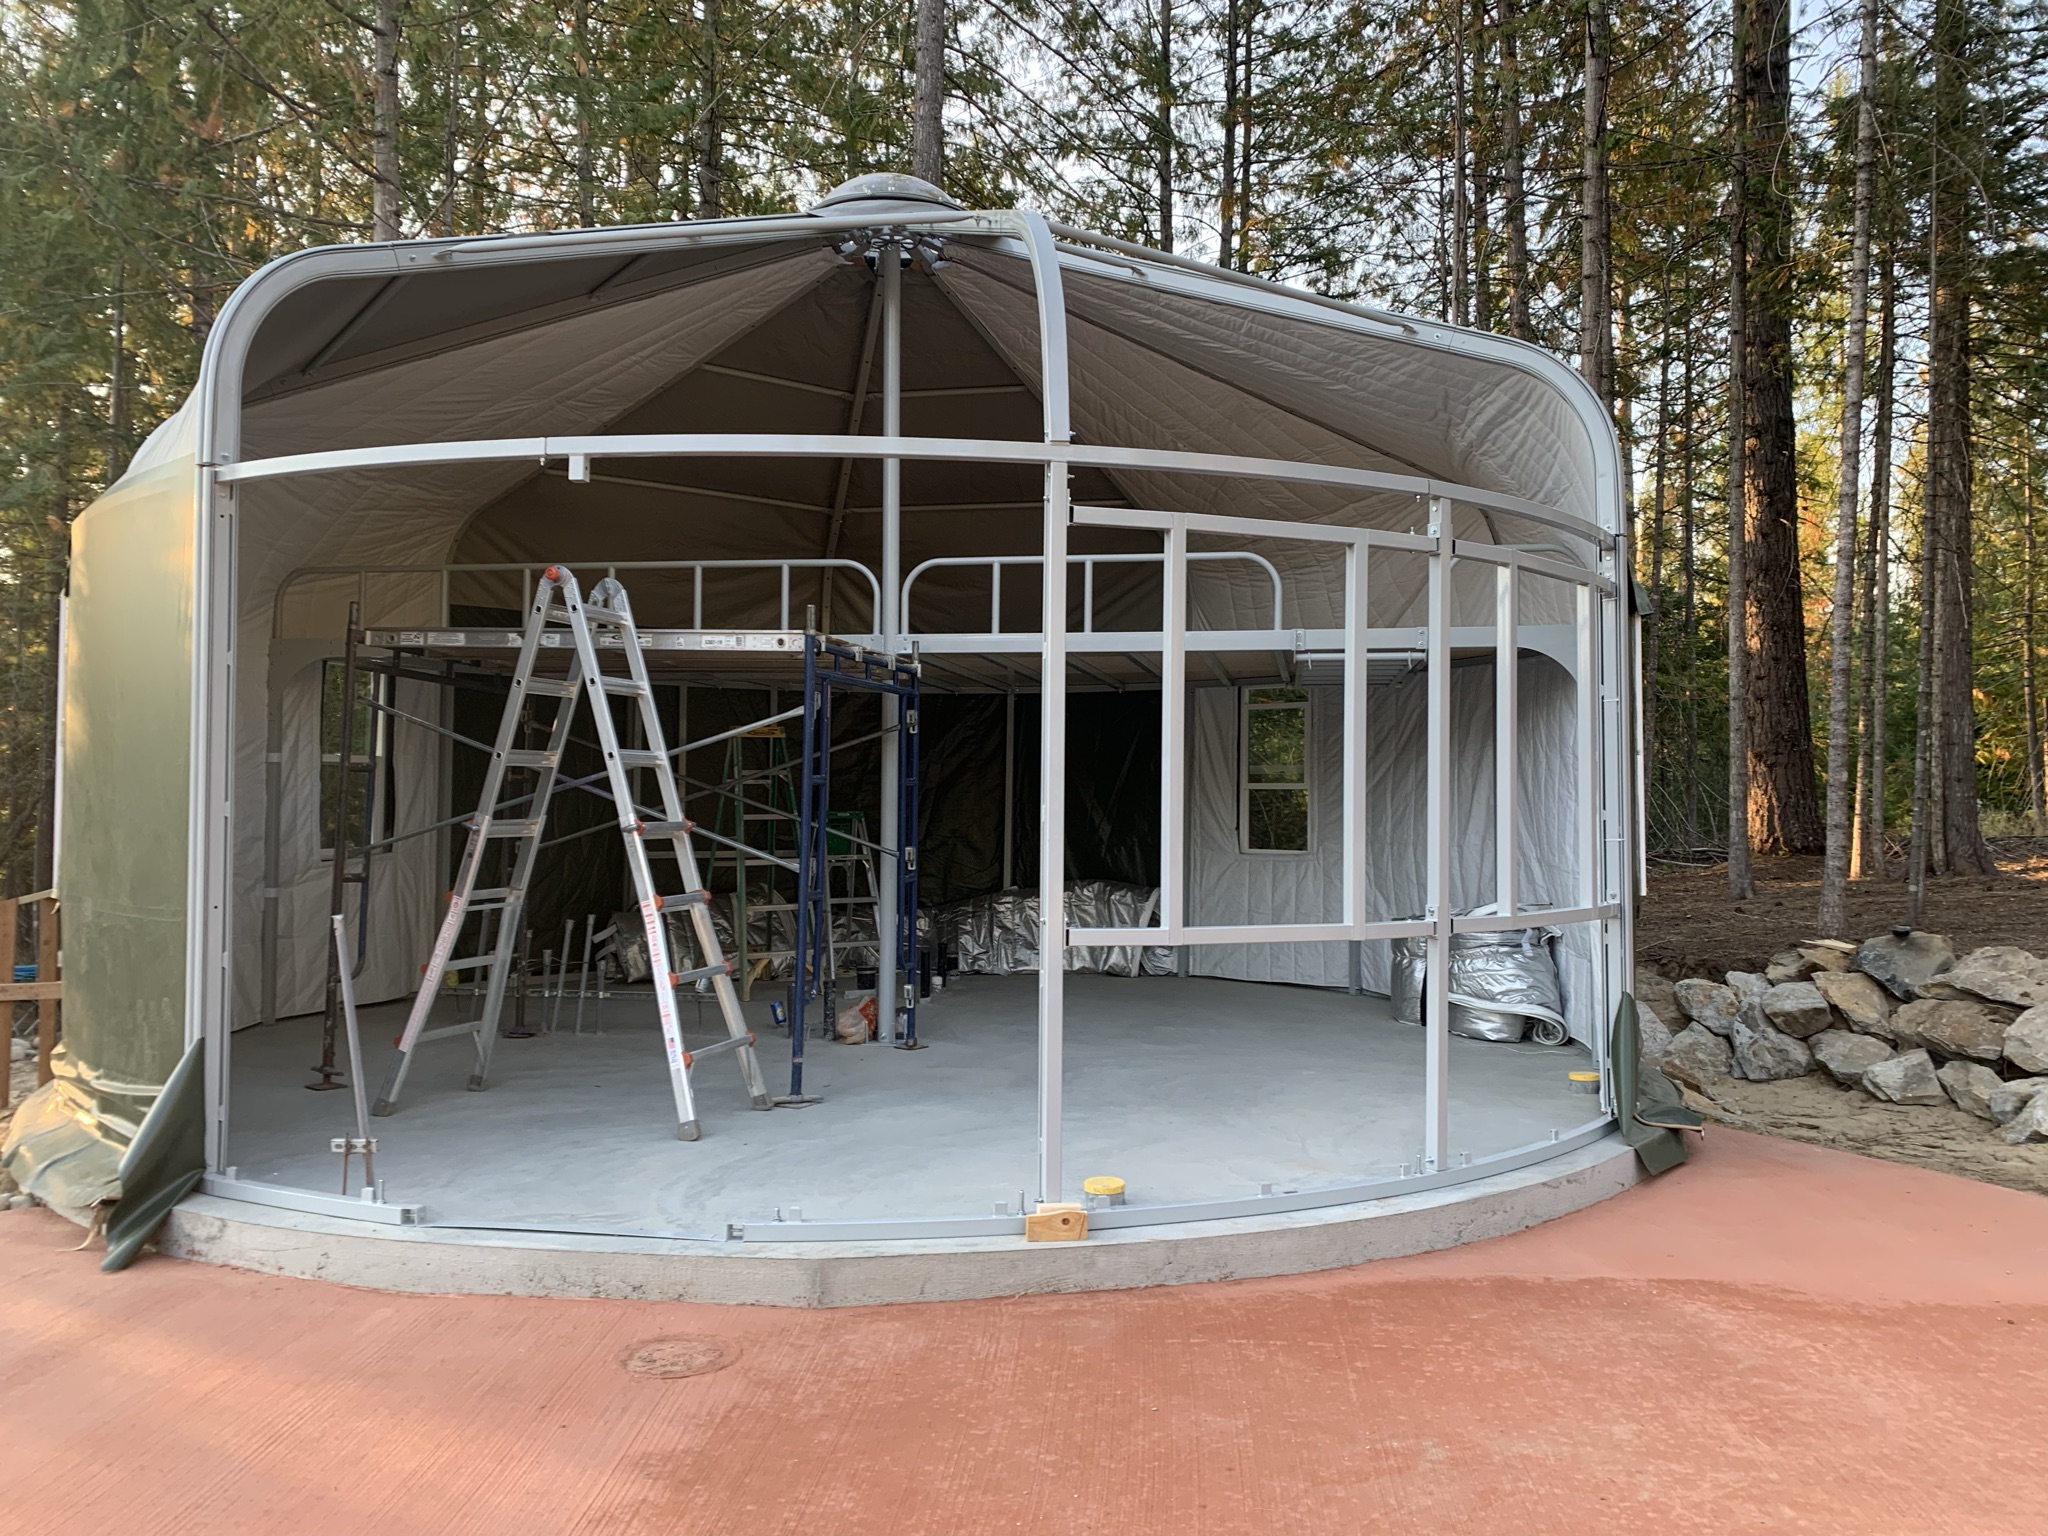
If you’re thinking about building a yurt, you need to keep in mind that the center is 14 feet high, and there’s a big heavy dome to construct, as well as steel or wooden beams. So, you’ll need some strong individuals to help you with the construction. In the yurt-building communities, where I joined, most people suggested having 4-8 helpers on your team. It is important to have someone who has building experience as one of your helpers or at least on speed dial. Two months before starting the project, I began recruiting possible team members, reserving scaffolding at the equipment renting facility and checking with neighbors and contractors if they could help us move the yurt up the driveway when it is delivered.
Many people asked why we didn’t just hire construction or handy men. However, it was a sellers’ market in the early fall of 2021, making hiring anyone nearly impossible. Additionally, they were demanding premium prices of $50-$85 an hour. Most people raise a yurt with family and friends, so we decided to do the same. We also chose to do it on a long 3–4-day weekend, Labor Day weekend, to accommodate people’s schedules. Luckily, we had many retired friends as well.
Despite being super busy getting our property ready, we took the time to get involved in our community by joining local organizations such as the Pend Oreille Peddlers (our local mountain bike non-profit) and volunteering to help build trails and support local races. We also joined conservation groups like the Idaho Conservation League, Kaniksu Land Trust, and Friends of Scotchman Peak thanks to some local friends’ suggestions. We found wonderful people who became fast friends and several even volunteered to help with our yurt raising.
At about three weeks before the start, we had three people confirmed to come from Portland, Oregon, and three people confirmed to come locally, in addition to Greg and me. A week before people arrived, I made sure everyone had their COVID-19 vaccines and noted their food preferences and allergies. We also went through the installation manual about 5 times to ensure we had all the necessary tools and the list of parts. This meant several trips to Home Depot, local building supply stores and we made sure to have a local friend who had power tools or knew people with power tools to call on when needed. A few important tools to make sure you have included scaffolding that reaches at least 12 feet, several ladders, lots of power drills and impact drivers, a concrete impact driver if you have a concrete slab, a mallet, different-sized levels, ropes with carabiners to pull down vinyl, canvas, insulation, and lots of different drill bits.
It is important to take care of your volunteers, so I made sure to have plenty of drinks, snacks, and all meals covered for the 3-4 days of the build. I also purchased a gift for each volunteer to thank them at the end of the build for taking a holiday weekend away from their families to help us. Designate one person as the leader who guides the team at all times and ensures steps or parts are not missed. Everyone should have a job so no one feels they are wasting their time just sitting there, even if it is cooking, cleaning up, or organizing parts and materials. Every job is important and must get done so things flow easily throughout the project.
The night before the big kick-off, we took out folks who were interested for dinner. Each day, we began by planning for the day, assigning specific jobs for everyone, and addressing any issues from the previous day that needed to be resolved or improved. We welcomed feedback and ideas on how things could be done better. We especially valued the input of people with construction experience. During the build, it’s important to put your ego aside and listen to everyone’s suggestions. We were often saved by friends who had built an addition or a home and could offer ideas on how to do something better than the installation manual suggested. Sometimes, the manual doesn’t fully explain how to do something, and you’ll need to interpret and wing it. I always had one person helping me layout all the parts of the next step, so it was ready when the team completed the previous step. This gave us enough time to run to Home Depot or home to get missing parts or tools. Make sure you have the yurt company building lead in your contacts, and agree on their availability for phone calls or texts during the build. You’ll be calling them for help and guidance many times.
It’s essential to ensure that everyone takes breaks, eats lunch, and ends the day at a reasonable hour. You’re moving heavy equipment and using dangerous power tools, and you don’t want anyone to get hurt. Our Yurt from Weatherport was all steel (very heavy), so we made sure to take a few breaks in the day. We made sure to end the day by 4-4:30 pm, so people weren’t working exhausted. We provided ice-cold beers, sparkling water, and dinner for those who wanted it. At the end of the day, we also held a debrief to discuss what could have been done better and what we needed to focus on the next day. We saw people working 12-hour days and in the dark on yurt sites. We highly recommend against this.
We would have completed our yurt raising in three days, but unfortunately, a few of our vinyl and insulation pieces were incorrectly made. We had to have the yurt company recut the pieces and send them out. The company sent out a couple of guys to help us finish the yurt and fix a few items that were incorrect in the manual and missing parts. A lesson learned from us: if you get a yurt company that makes you a custom yurt, double and triple-check the drawings they send back to you and question the dimensions. Take the time to slow down and check again before you sign on the dotted line or ask for additional drawings when something is unclear. We were so busy getting the property ready before the yurt arrived that we okayed drawings that did not have exact dimensions. Hindsight tells us that we should have asked for the dimensions. When they arrived, windows were placed where they could not be, and what I interpreted as a certain distance, the yurt company interpreted as a different distance.
Really think through your heating options. At first, we planned to use a wood stove, but we realized we didn’t have enough room when our couch was pulled out as a bed. Then we rushed to get wall electric heaters when we should have planned for a mini-split in the first place. In the end, we installed a gas fireplace 6 months later (we had to wait for the ground to thaw to install supports for the flue). It doesn’t need such a big flue, it was a lot less than a wood stove, takes zero electricity, it can stay on when we were gone, it’s easy for guests to manage and its beautiful to watch. It is also a huge cost savings, on the coldest month our electricity bill was $450 while the following year even colder month is was $220 with using just gas.
Since we still had three people from Portland still here, we built our barrel sauna. After 1.5 years of use, we love our barrel sauna. With the dramatic temperature changes in Northern Idaho our sauna was expanding and contracting so much, we were worried om the longevity of the structure, so we built a roof for it this year. It does a good job keeping snow and rain out, so the wood doesn’t expand and contract as much, and we don’t get drips in our face when enjoying the heat.
If you live in an area with heavy snowfall, it’s important to be prepared for condensation in your yurt. We neglected to prepare for this issue and experienced significant flooding during the first snowfall and extreme temperature changes. To solve the problem, we invested in two dehumidifiers that run continuously throughout the day and night during the late fall, winter, and early spring when we can’t open our windows. However, it’s important to allow your yurt to breathe by opening windows or the dome for at least an hour a day when the weather is mild and dry. Additionally, we worked closely with the yurt company to improve insulation and better fit the windows to prevent condensation from forming between the layers. This required some significant work, including fixing doors and windows, but in the end, we were able to get everything resolved. It is very important to seal the inside and outside bottom of the yurt to keep critters and cold air/water/snow out.
If you plan to install a cement floor, we highly recommend giving it a month to cure and then sealing the floor before building the yurt, if you have time. This will prevent staining, make it stronger if you drop items on it. We recommend a product from Amazon that is reasonably priced, dries quickly, and provides great results. I really like the look; you can also add a stain for a different color. We had to stain ours while living in it (very stinky and prepare for headache). We may try that when we reseal in another couple years.
After completing the yurt, we installed two non-load bearing walls for the kitchen and bathroom. This is something you can do yourself and don’t need a contractor (there are great YouTube videos to guide you). This was a bit more challenging than building standard 12-foot interior walls, as we had to fit everything under the 7-foot loft. This meant cutting the 8-foot 2 x 4 studs, installing the bottom plate, and drilling it into place on the cement while cutting squares for the electrical and plumbing pipes. We then had to toenail the far right and left studs in place, install the top plate, toenail it in, and screw it to the steel beams at the top of the loft. Finally, we toenailed the stud to the top and bottom plate every 16 inches. This process took us two full days, despite it only taking eight hours under normal circumstances.
Once we completed the interior electrical and plumbing work, the state inspectors conducted a final inspection, and we were able to close the walls. Instead of using drywall, we chose to install ¼” birch, which is more attractive, less messy, and takes up less space. Cutting out outlets, thermostats, etc. required precision and working backward, as the material chips easily when cut. We recommend buying a few extra pieces to account for any mistakes. Once we had installed all the appliances in the correct spots, we brought in the electrician, plumber, and cabinet installers to finish the bathroom, kitchen, and overall yurt lighting/outlets.
For most of our appliances and furniture, we purchased from Home Depot, Amazon, and local furniture companies. This allowed for free shipping and returns, support for local businesses, and ensured that furniture arrived after we had a place to store it, see previous blog for links to our suggestions.
A few recommendations for a smoother Yurt Raising:
Tools: When your yurt arrives it comes in huge, heavy, wooden boxes, make sure the tractor or skid steer has extra-long forks to move it and can handle 2-5000 pounds, 6 feet wide, 6 feet high and12 feet long. Be ready to rent tools or borrow tools last minute.
Gas stoves are cheaper in the long run, offer better sleep, and reduce back pain. While you may have plenty of wood on your property, wood stoves can be very expensive right now due to the long flue required. Additionally, you will need to stoke the stove in the middle of the night and venture out into the cold and snow to gather wood. In contrast, gas stoves are half the price to purchase and install, and they warm our yurt perfectly while being easy to maintain. We found that our electric wall and toe kick heaters were very expensive during the coldest month (costing us $450), but our bill was reduced by half when we switched to gas heat.
Planning for the future can save you money in the long run. Although we knew we would eventually add a garage, we didn’t plan ahead and have a freeze-free water spigot installed, nor did we run the electrical line beforehand. If we had, it would have been easier to build the garage later on, as all the trenches would have already been made. Instead, we now have to add a breaker, run a new trench and line down to the garage, and find another electrician with availability to install it.
Keeping extra parts on hand is always a good idea, as you never know when you’ll need them. For example, we had a few finished plywood pieces for the loft floor that were cut incorrectly and needed to be replaced. Rather than throwing them away, we found a creative use for them by making a desk that had the perfect circular angle cut. We also had extra vinyl that we used to reinforce the holes we cut to feed the gas pipe and flue. We used the wood boxes that the yurt came in as wood storage.