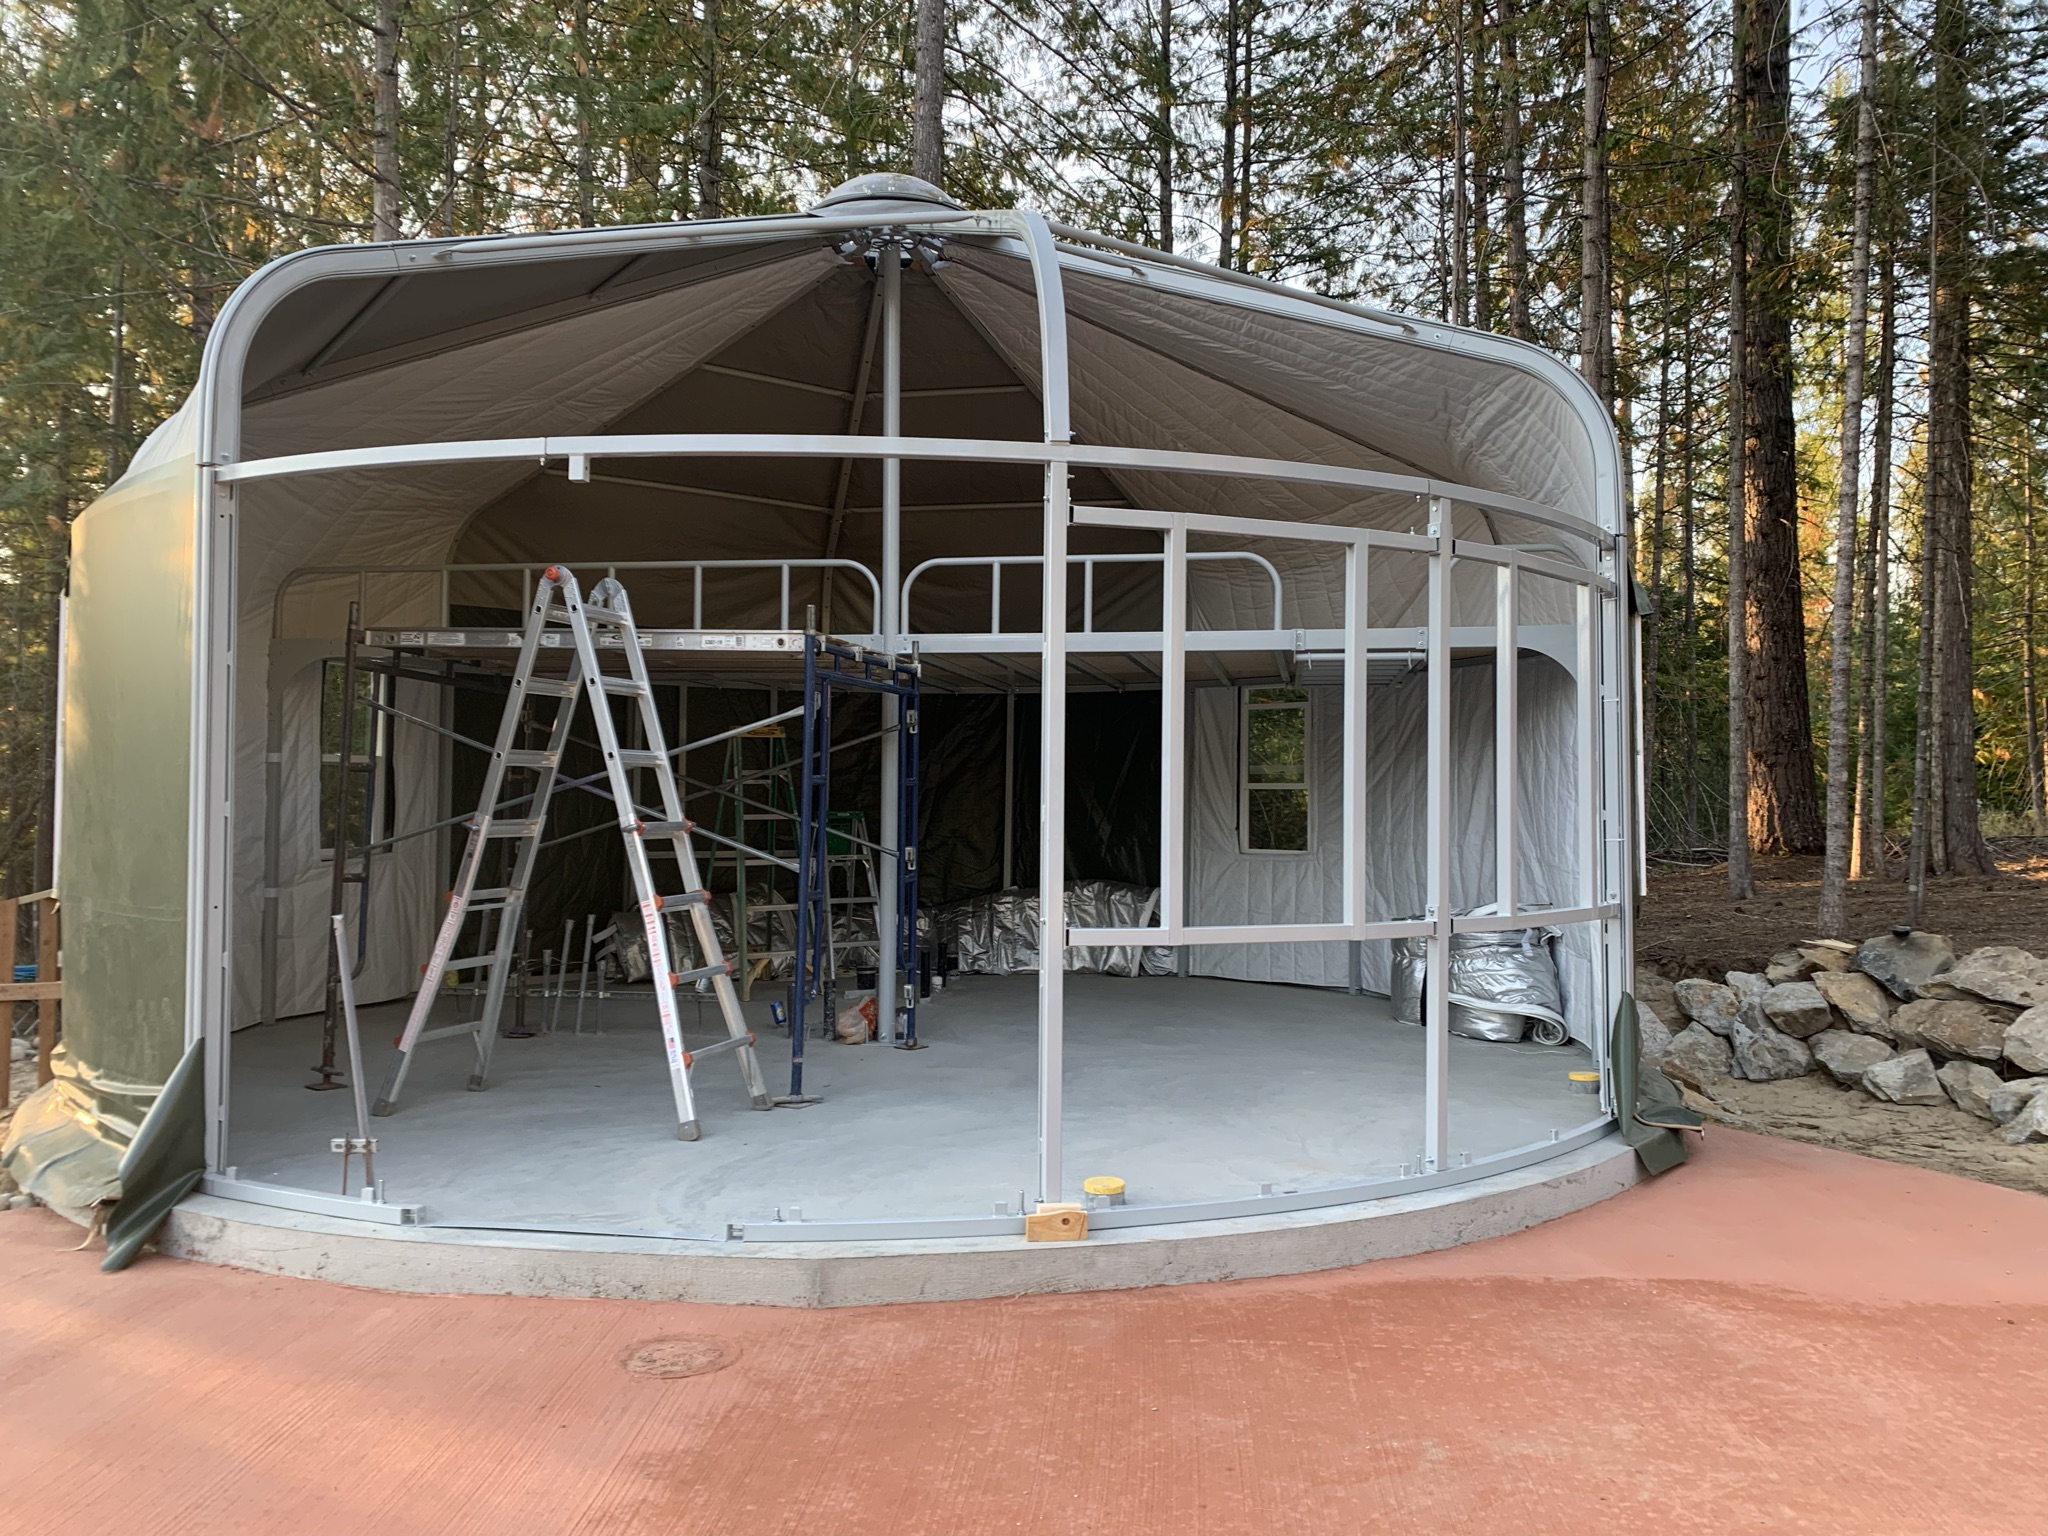
If you’re thinking about building a yurt, you need to keep in mind that the center is 14 feet high, and there’s a big heavy dome to construct, as well as steel or wooden beams. So, you’ll need some strong individuals to help you with the construction. In the yurt-building communities, where I joined, most people suggested having 4-8 helpers on your team. It is important to have someone who has building experience as one of your helpers or at least on speed dial. Two months before starting the project, I began recruiting possible team members, reserving scaffolding at the equipment renting facility and checking with neighbors and contractors if they could help us move the yurt up the driveway when it is delivered.


Many people asked why we didn’t just hire construction or handy men. However, it was a sellers’ market in the early fall of 2021, making hiring anyone nearly impossible. Additionally, they were demanding premium prices of $50-$85 an hour. Most people raise a yurt with family and friends, so we decided to do the same. We also chose to do it on a long 3–4-day weekend, Labor Day weekend, to accommodate people’s schedules. Luckily, we had many retired friends as well.
Despite being super busy getting our property ready, we took the time to get involved in our community by joining local organizations such as the Pend Oreille Peddlers (our local mountain bike non-profit) and volunteering to help build trails and support local races. We also joined conservation groups like the Idaho Conservation League, Kaniksu Land Trust, and Friends of Scotchman Peak thanks to some local friends’ suggestions. We found wonderful people who became fast friends and several even volunteered to help with our yurt raising.


At about three weeks before the start, we had three people confirmed to come from Portland, Oregon, and three people confirmed to come locally, in addition to Greg and me. A week before people arrived, I made sure everyone had their COVID-19 vaccines and noted their food preferences and allergies. We also went through the installation manual about 5 times to ensure we had all the necessary tools and the list of parts. This meant several trips to Home Depot, local building supply stores and we made sure to have a local friend who had power tools or knew people with power tools to call on when needed. A few important tools to make sure you have included scaffolding that reaches at least 12 feet, several ladders, lots of power drills and impact drivers, a concrete impact driver if you have a concrete slab, a mallet, different-sized levels, ropes with carabiners to pull down vinyl, canvas, insulation, and lots of different drill bits.
It is important to take care of your volunteers, so I made sure to have plenty of drinks, snacks, and all meals covered for the 3-4 days of the build. I also purchased a gift for each volunteer to thank them at the end of the build for taking a holiday weekend away from their families to help us. Designate one person as the leader who guides the team at all times and ensures steps or parts are not missed. Everyone should have a job so no one feels they are wasting their time just sitting there, even if it is cooking, cleaning up, or organizing parts and materials. Every job is important and must get done so things flow easily throughout the project.
The night before the big kick-off, we took out folks who were interested for dinner. Each day, we began by planning for the day, assigning specific jobs for everyone, and addressing any issues from the previous day that needed to be resolved or improved. We welcomed feedback and ideas on how things could be done better. We especially valued the input of people with construction experience. During the build, it’s important to put your ego aside and listen to everyone’s suggestions. We were often saved by friends who had built an addition or a home and could offer ideas on how to do something better than the installation manual suggested. Sometimes, the manual doesn’t fully explain how to do something, and you’ll need to interpret and wing it. I always had one person helping me layout all the parts of the next step, so it was ready when the team completed the previous step. This gave us enough time to run to Home Depot or home to get missing parts or tools. Make sure you have the yurt company building lead in your contacts, and agree on their availability for phone calls or texts during the build. You’ll be calling them for help and guidance many times.


It’s essential to ensure that everyone takes breaks, eats lunch, and ends the day at a reasonable hour. You’re moving heavy equipment and using dangerous power tools, and you don’t want anyone to get hurt. Our Yurt from Weatherport was all steel (very heavy), so we made sure to take a few breaks in the day. We made sure to end the day by 4-4:30 pm, so people weren’t working exhausted. We provided ice-cold beers, sparkling water, and dinner for those who wanted it. At the end of the day, we also held a debrief to discuss what could have been done better and what we needed to focus on the next day. We saw people working 12-hour days and in the dark on yurt sites. We highly recommend against this.


We would have completed our yurt raising in three days, but unfortunately, a few of our vinyl and insulation pieces were incorrectly made. We had to have the yurt company recut the pieces and send them out. The company sent out a couple of guys to help us finish the yurt and fix a few items that were incorrect in the manual and missing parts. A lesson learned from us: if you get a yurt company that makes you a custom yurt, double and triple-check the drawings they send back to you and question the dimensions. Take the time to slow down and check again before you sign on the dotted line or ask for additional drawings when something is unclear. We were so busy getting the property ready before the yurt arrived that we okayed drawings that did not have exact dimensions. Hindsight tells us that we should have asked for the dimensions. When they arrived, windows were placed where they could not be, and what I interpreted as a certain distance, the yurt company interpreted as a different distance.
Really think through your heating options. At first, we planned to use a wood stove, but we realized we didn’t have enough room when our couch was pulled out as a bed. Then we rushed to get wall electric heaters when we should have planned for a mini-split in the first place. In the end, we installed a gas fireplace 6 months later (we had to wait for the ground to thaw to install supports for the flue). It doesn’t need such a big flue, it was a lot less than a wood stove, takes zero electricity, it can stay on when we were gone, it’s easy for guests to manage and its beautiful to watch. It is also a huge cost savings, on the coldest month our electricity bill was $450 while the following year even colder month is was $220 with using just gas.
Since we still had three people from Portland still here, we built our barrel sauna. After 1.5 years of use, we love our barrel sauna. With the dramatic temperature changes in Northern Idaho our sauna was expanding and contracting so much, we were worried om the longevity of the structure, so we built a roof for it this year. It does a good job keeping snow and rain out, so the wood doesn’t expand and contract as much, and we don’t get drips in our face when enjoying the heat.
If you live in an area with heavy snowfall, it’s important to be prepared for condensation in your yurt. We neglected to prepare for this issue and experienced significant flooding during the first snowfall and extreme temperature changes. To solve the problem, we invested in two dehumidifiers that run continuously throughout the day and night during the late fall, winter, and early spring when we can’t open our windows. However, it’s important to allow your yurt to breathe by opening windows or the dome for at least an hour a day when the weather is mild and dry. Additionally, we worked closely with the yurt company to improve insulation and better fit the windows to prevent condensation from forming between the layers. This required some significant work, including fixing doors and windows, but in the end, we were able to get everything resolved. It is very important to seal the inside and outside bottom of the yurt to keep critters and cold air/water/snow out.
If you plan to install a cement floor, we highly recommend giving it a month to cure and then sealing the floor before building the yurt, if you have time. This will prevent staining, make it stronger if you drop items on it. We recommend a product from Amazon that is reasonably priced, dries quickly, and provides great results. I really like the look; you can also add a stain for a different color. We had to stain ours while living in it (very stinky and prepare for headache). We may try that when we reseal in another couple years.


After completing the yurt, we installed two non-load bearing walls for the kitchen and bathroom. This is something you can do yourself and don’t need a contractor (there are great YouTube videos to guide you). This was a bit more challenging than building standard 12-foot interior walls, as we had to fit everything under the 7-foot loft. This meant cutting the 8-foot 2 x 4 studs, installing the bottom plate, and drilling it into place on the cement while cutting squares for the electrical and plumbing pipes. We then had to toenail the far right and left studs in place, install the top plate, toenail it in, and screw it to the steel beams at the top of the loft. Finally, we toenailed the stud to the top and bottom plate every 16 inches. This process took us two full days, despite it only taking eight hours under normal circumstances.
Once we completed the interior electrical and plumbing work, the state inspectors conducted a final inspection, and we were able to close the walls. Instead of using drywall, we chose to install ¼” birch, which is more attractive, less messy, and takes up less space. Cutting out outlets, thermostats, etc. required precision and working backward, as the material chips easily when cut. We recommend buying a few extra pieces to account for any mistakes. Once we had installed all the appliances in the correct spots, we brought in the electrician, plumber, and cabinet installers to finish the bathroom, kitchen, and overall yurt lighting/outlets.


For most of our appliances and furniture, we purchased from Home Depot, Amazon, and local furniture companies. This allowed for free shipping and returns, support for local businesses, and ensured that furniture arrived after we had a place to store it, see previous blog for links to our suggestions.
A few recommendations for a smoother Yurt Raising:
- Tools: When your yurt arrives it comes in huge, heavy, wooden boxes, make sure the tractor or skid steer has extra-long forks to move it and can handle 2-5000 pounds, 6 feet wide, 6 feet high and12 feet long. Be ready to rent tools or borrow tools last minute.
- Gas stoves are cheaper in the long run, offer better sleep, and reduce back pain. While you may have plenty of wood on your property, wood stoves can be very expensive right now due to the long flue required. Additionally, you will need to stoke the stove in the middle of the night and venture out into the cold and snow to gather wood. In contrast, gas stoves are half the price to purchase and install, and they warm our yurt perfectly while being easy to maintain. We found that our electric wall and toe kick heaters were very expensive during the coldest month (costing us $450), but our bill was reduced by half when we switched to gas heat.
- Planning for the future can save you money in the long run. Although we knew we would eventually add a garage, we didn’t plan ahead and have a freeze-free water spigot installed, nor did we run the electrical line beforehand. If we had, it would have been easier to build the garage later on, as all the trenches would have already been made. Instead, we now have to add a breaker, run a new trench and line down to the garage, and find another electrician with availability to install it.
- Keeping extra parts on hand is always a good idea, as you never know when you’ll need them. For example, we had a few finished plywood pieces for the loft floor that were cut incorrectly and needed to be replaced. Rather than throwing them away, we found a creative use for them by making a desk that had the perfect circular angle cut. We also had extra vinyl that we used to reinforce the holes we cut to feed the gas pipe and flue. We used the wood boxes that the yurt came in as wood storage.